Part 3 of 4 — Building a HackerSpace Badge · Previous: Building on the Breadboard · Next: Ordering the Boards
A working breadboard is a promise, not a product. To actually get a badge, I needed to turn that circuit into a PCB, and that meant laying out a board in KiCad.
I had already drawn the schematics in KiCad, but I had never laid out a board, so I leaned on YouTube tutorials to find my footing. The schematic turned out to be the easy part.
Laying out the board was where the real work started, placing every component and routing the connections so everything fit on a shape the size of a badge.
Drawing the outline was new to me, and the slot across the top was newer still. I had never cut a hole in a board before, and this one had a job to do: a badge clip slides through it so the whole thing can hang from a lanyard and actually be seen. I measured the spacing off my BSides Buffalo badge and copied it. Getting it centered was a little fiddly.
Placing the parts turned into its own lesson. The component labels and the footprints kept running into each other, and worse, into the space where the logo was going. I had to learn how to move silkscreen text around and edit footprints so nothing overlapped and nothing printed on top of the art.
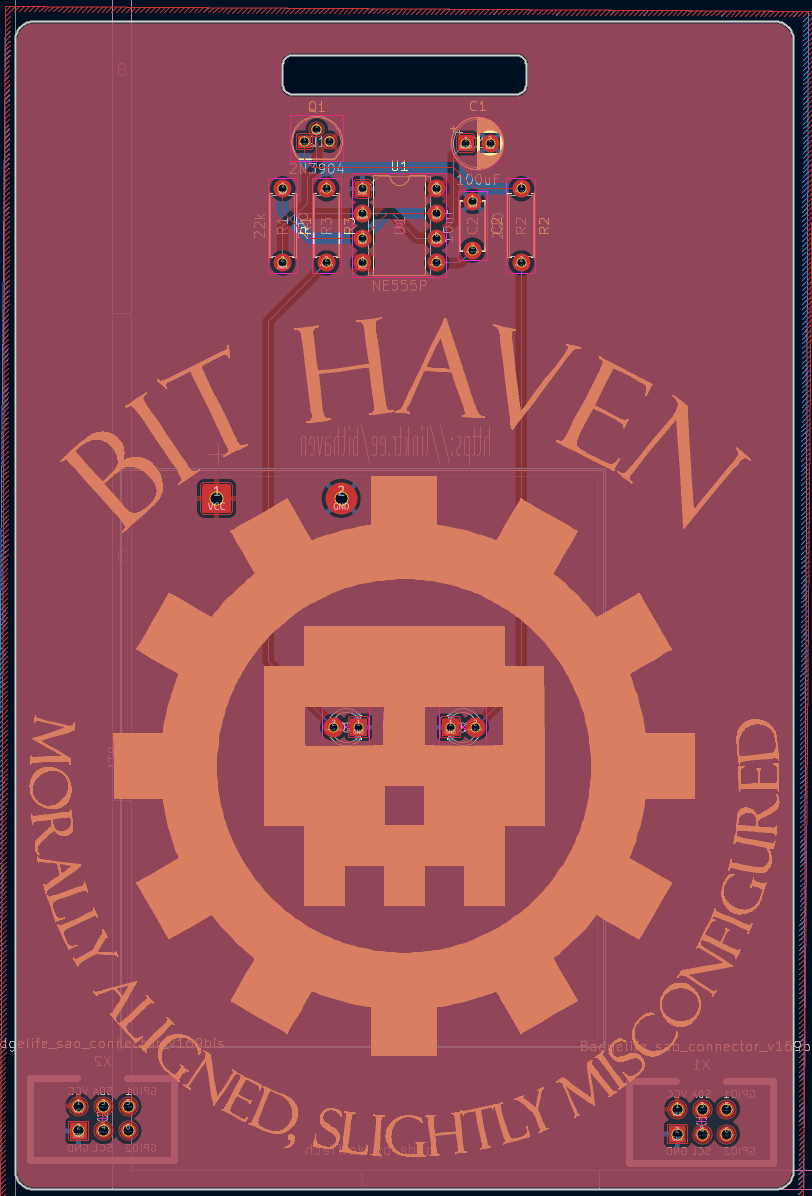
The board layout in KiCad. The two traces running down from the circuit at the top are what feed the LEDs in the skull's eyes.
Once the layout was sorted, I got to the fun part: the silkscreen.
The art is not mine. Bit Haven already had a logo and I downloaded it from their Discord. There were two versions of it. One was just the skull and the gear. The other had the name arched over the top and “Morally aligned, slightly misconfigured” curved around the bottom. I went with the words. The gear on its own does not tell you anything, since nobody outside the space would know what it stood for, and the motto is the part that actually says who they are.
Getting it onto the board took a detour through Inkscape, because the file I downloaded was not in a format KiCad could import, which was SVG. Once I had converted it, the rest was sizing it and placing it so the two LEDs landed in the skull’s eye sockets instead of somewhere near them.
The moment it stopped feeling like a circuit and started feeling like a badge was when I opened KiCad’s 3D viewer. Seeing the board rendered as a real object, art and all, was the first time it looked like something someone would actually want to wear.
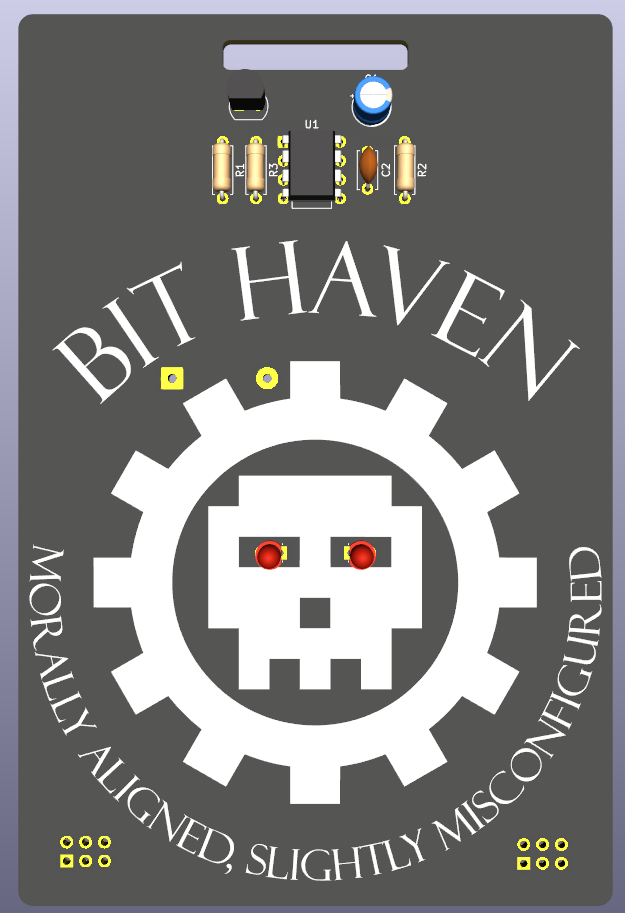
The front, rendered in KiCad's 3D viewer. This is where it stopped being a schematic.
With the front settled I turned the board over. The back got a link to Bit Haven’s Linktree, and “made by WolfTech”, since I was the one making the boards.
The two connectors in the bottom corners were a late addition. I own badges from BSides Buffalo and BSides Rochester, and I had been studying those and other badges online as research. A lot of them carry SAO headers so people can plug add-on boards in. It seemed like the kind of thing that would make this one more fun, so I squeezed a pair in before I called the layout done.
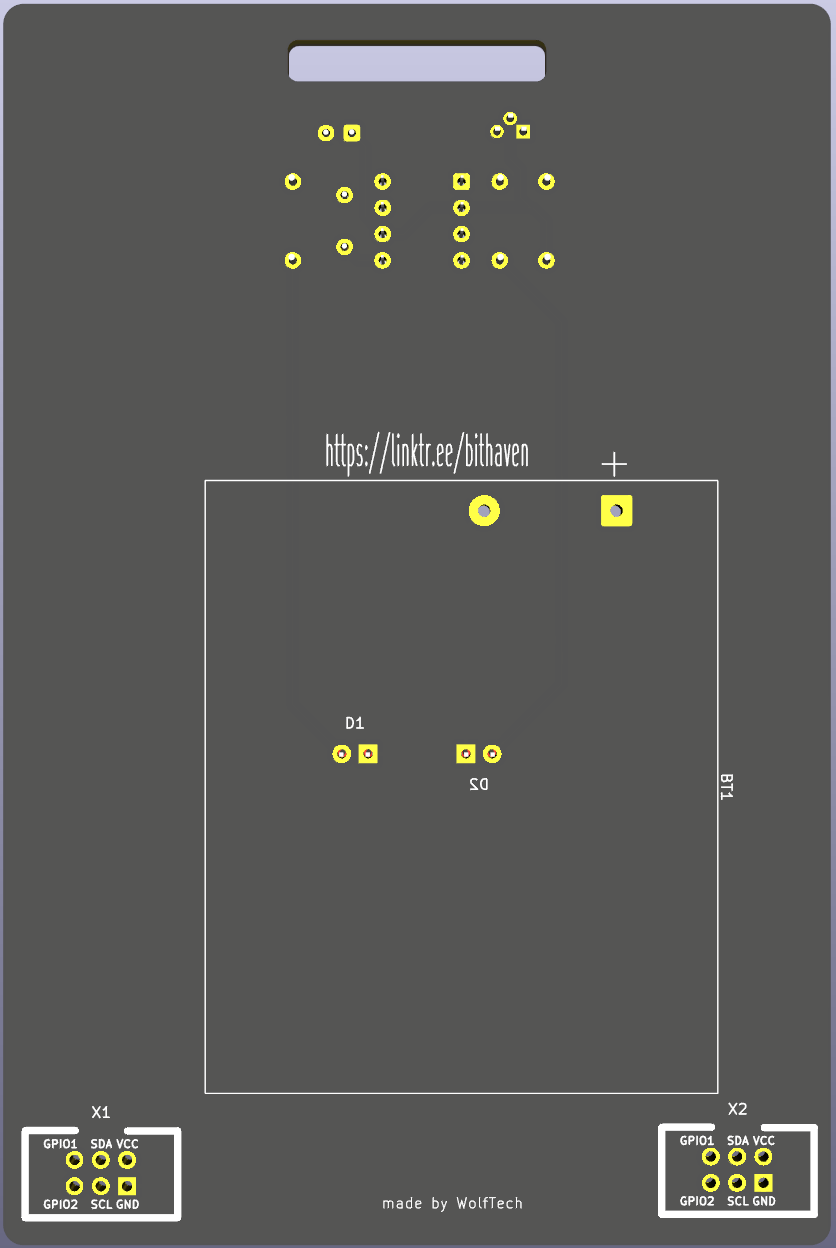
The back. The Linktree link, the maker credit, and the two SAO headers with every pin labelled.
Before exporting anything I ran the design rule check. It came back with a few silkscreen warnings, leftovers from all that shuffling of labels, and I looked them over and decided I could live with them. Nothing else came up.
I had it looking exactly how I wanted, so I did the exciting, foolish thing and sent it off to be made.
That night, lying in bed, I caught myself wondering whether I had missed any connections. I decided it was fine and went to sleep. I should have slept on it first.